SLA Printed Microneedle Patch for Drug Delivery Systems using Nano Particles for Targeted Drug Delivery - 2026
This research project is part of one of my BME classes. I chose it because I wanted to really push what 3D printing is capable of — these parts are so small that this project has basically become my way of finding the actual limits of the Formlabs 3BL.
The project: design and fabricate a microneedle patch (positive and negative) for drug delivery. We needed a patch with controlled drug release that could also hold specific polymers and nanoparticles. Down the line, those nanoparticles would be magnetoelectric, so we could actually steer them to specific sites in the body using magnetic fields.
For reference, the microneedles have a 500 micron base and a 1mm height.
To print that small, I had to build custom settings for the 3BL from scratch. All of this has been done using Clear V4.1 resin, which isn't ideal since it's, well, clear, but it's what we have in the lab.
The custom settings let me print at a 10 micron layer height for precision. I had to dial in exposure (separate values for perimeter, model fill, supports, and top surface, plus a whole exposure schedule for the earliest layers), roller speed, and cure timing to actually get results that held up.
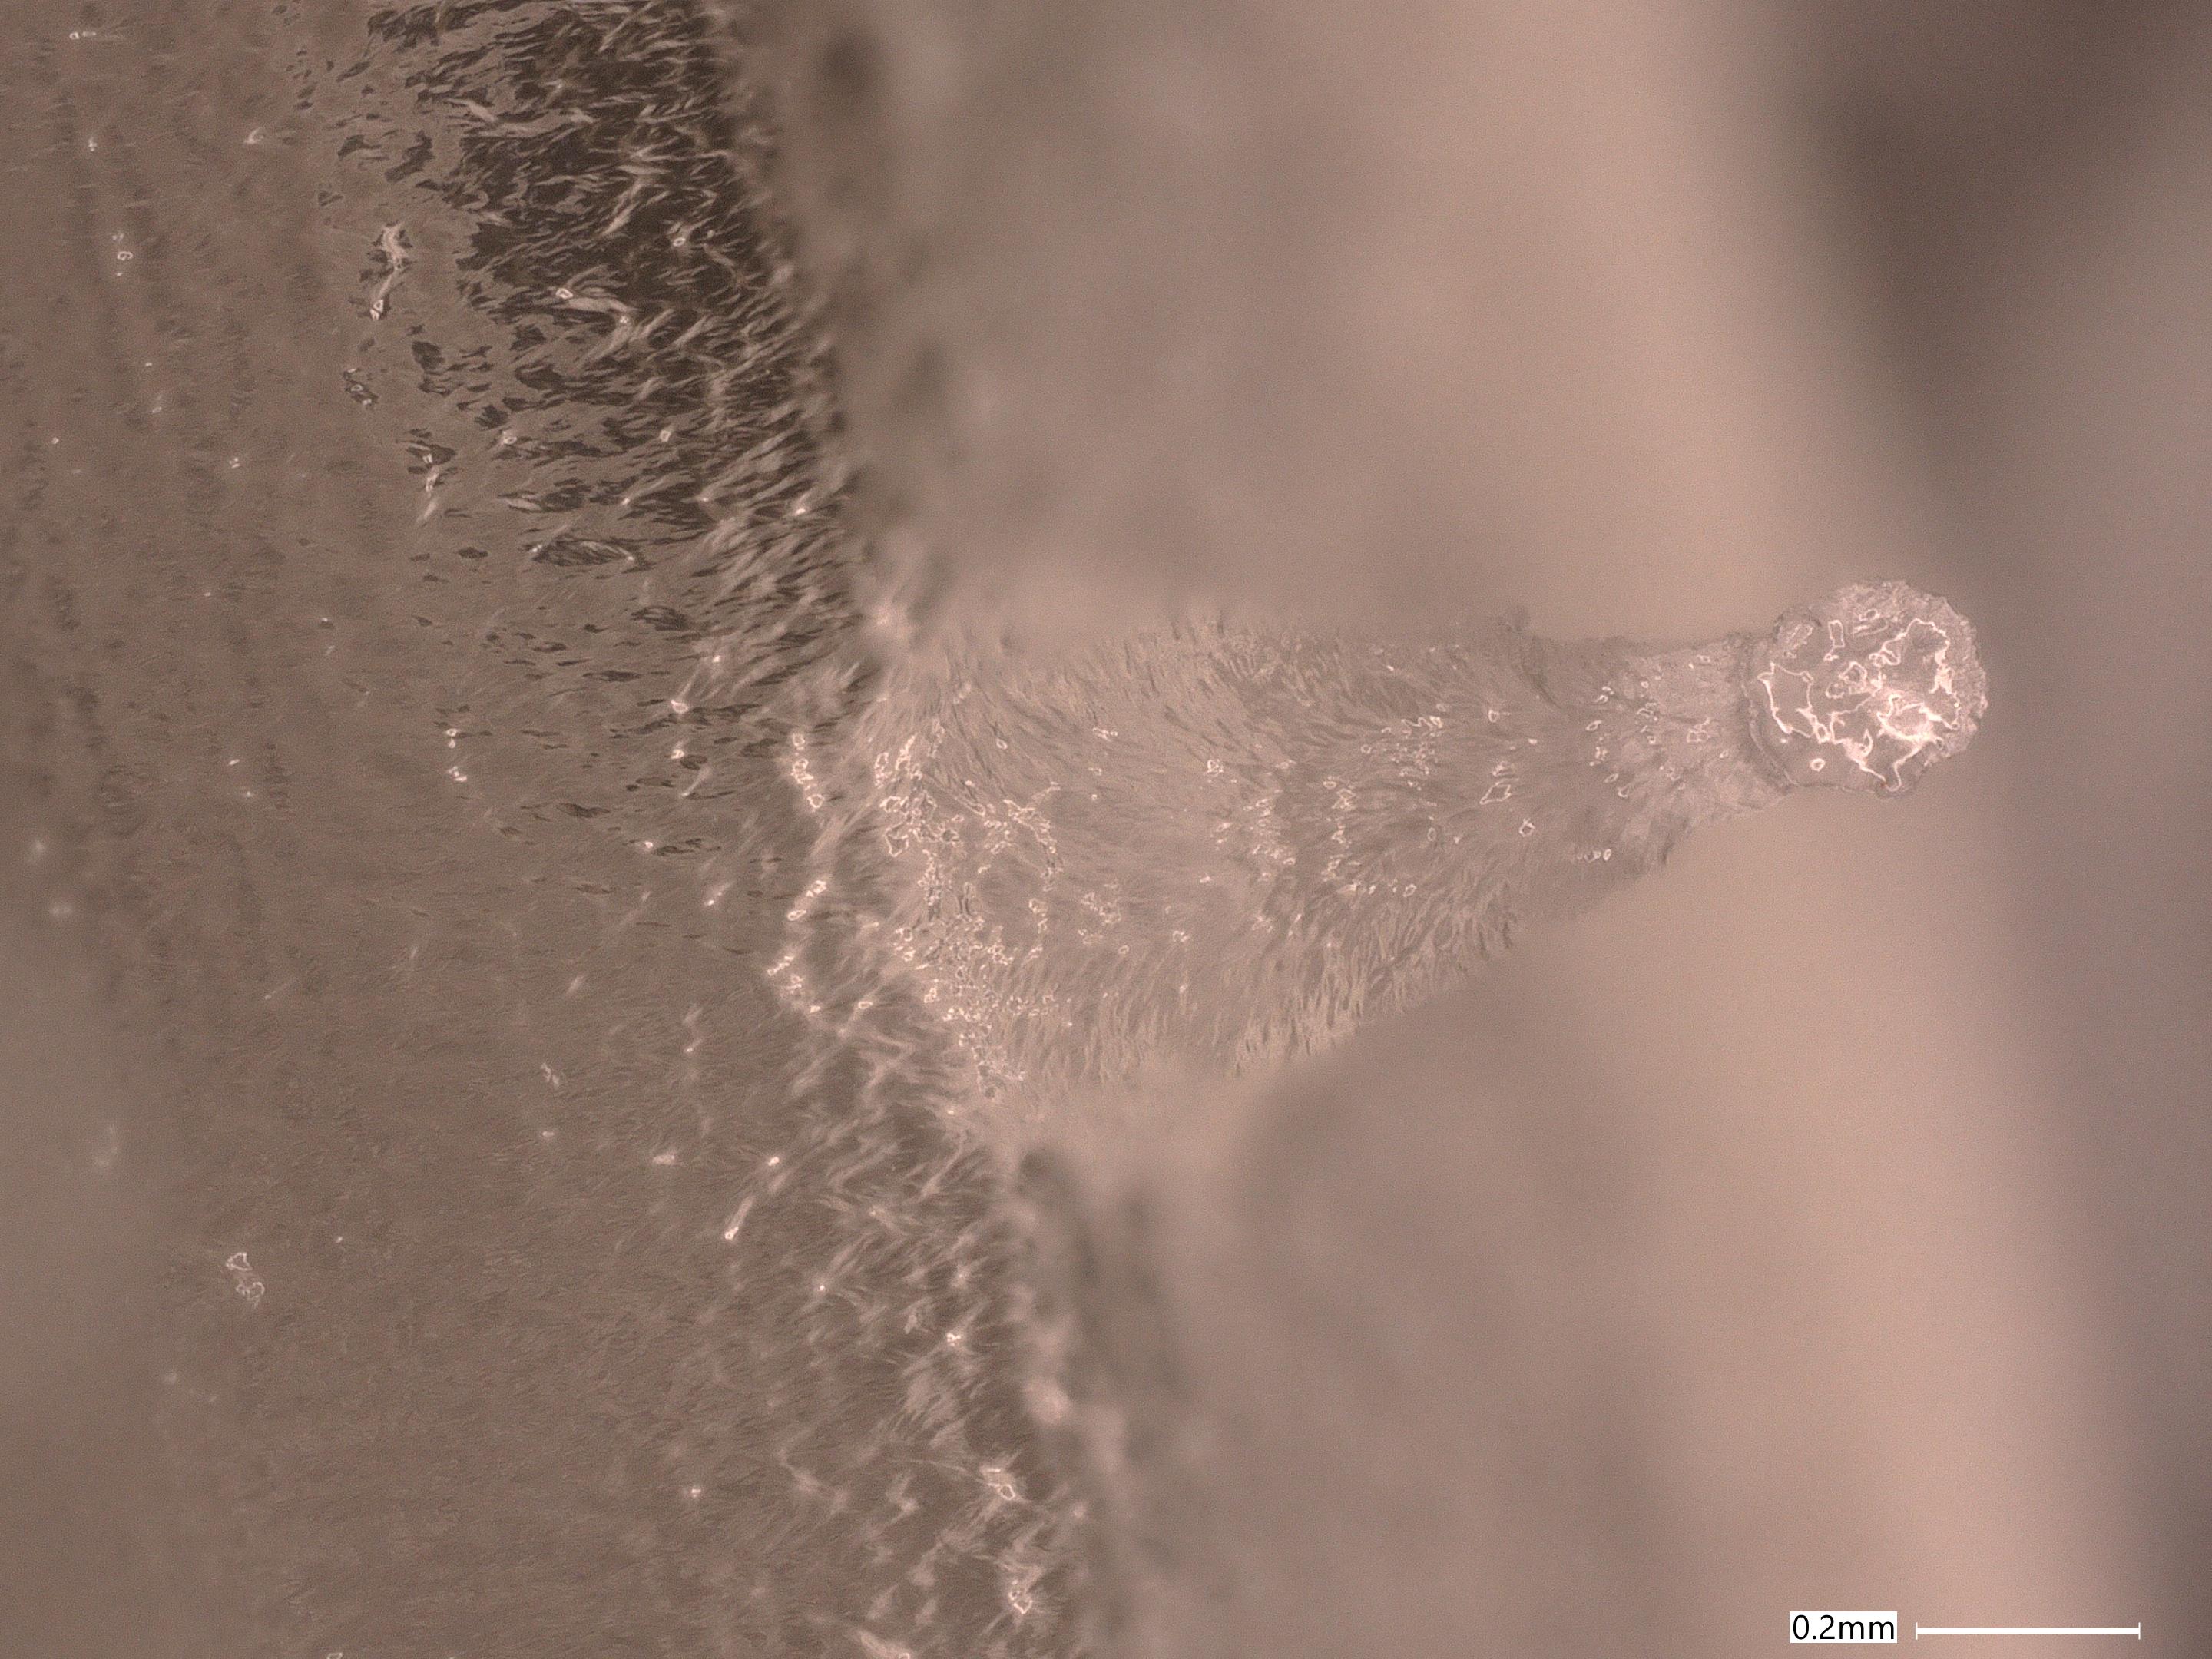
First attempts were a total failure. The needle kept coming out with a bulbous tip instead of the sharp point I'd designed. I figured maybe my post-laser cure wait time was too long, so I dropped it to 0 seconds.No luck.I was driving to school one day and it finally clicked.
I'd designed the needle to taper down to an infinitesimally small point, but the 3BL's laser only has an 85 micron spot size — it's physically incapable of printing anything smaller than that. So the printer kept trying to hit a point that didn't exist for it, and just cured on top of itself over and over, which is exactly what was causing the inverse cone. I was genuinely irritated with myself for not catching that sooner. It's the kind of thing I should've thought of on day one.
So I redesigned the tip to be 85 microns instead of a true point, and that fixed the core issue. There's still a slight bulbous tip, but it's dramatically better, and it was time to move on to the next part of the project.From there, I ran the print at a few different angles — 0°, 15°, 45°, and 90° — to see which gave the most consistent, reliable result. At 0° and 15°, the inverse cone was still noticeable and print quality wasn't consistent. At 90°, the cone disappeared, but resin dripped down the needle and partially cured on the way, leaving these little icicle-like drips instead of a clean tip. 45° turned out to be the sweet spot: the cone was mostly gone and the prints came out consistent batch after batch, so that's the angle I've stuck with since.
Post-processing matters just as much as the print itself. Once a print finishes, I hang the build plate so leftover resin can drip back into the tank, soak the needles in 99.9% IPA for 5 minutes to strip off any excess resin, and finish with a UV and heat cure (60°C for 15 minutes) to bring the mechanical properties up to where they need to be.
Then came testing. First, a basic penetration test — piercing sheets of aluminum foil. The needles pierced clean through without getting damaged. From there, I ran real compression testing on Instron's Universal Testing System, checking both the buckling threshold and full failure. The needles buckled at 20 kgf and didn't fully fail until 120 kgf. For reference, other studies show it only takes about 3.6 kgf to insert a microneedle into skin, so these needles have way more strength than they'll ever actually need.
While I was running mechanical testing, my teammate was tackling the negative mold. We initially hoped to outsource that step, but the two vendors we reached out to both passed since it wasn't headed toward full-scale production. So we brought it in-house with silicone molding, casting directly off the positive prints. Two-part liquid silicone didn't work at first. It couldn't fully cure while touching the resin/ so we switched to a two-part putty silicone, which held its shape and let enough air through to cure properly. Checked under a microscope, the resulting molds matched the original positive extremely well.
From there we started testing actual polymers in the mold, starting with Tannic Acid for its versatility, low cost, and compatibility with easy-to-evaporate solvents like acetone. Using the spin coater, we found it evaporated the solvent fine but also pushed the polymer straight out of the mold — so we pivoted to centrifuging instead, redesigning the molds to fit centrifuge tubes. So far, a 2:1 polymer-to-solvent ratio spun at 3,000 RPM for 3 minutes has given us the most solid, workable patches yet.
Somewhere in the middle of all this, I also ended up designing and building a new spin coater from scratch in Solidworks. The old one had a platform that wasn't perfectly flat, which threw off the balance and made the whole thing shake at speed, wrecking the coating. The new one is fully 3D printed in PETG (way more chemically resistant than PLA, and it won't crack, swell, or degrade from repeated solvent exposure), plug-and-play with just a USB-C cable and a lithium battery on an XT60 connector, and it's got a lid made from clear, post-processed Clear V4.1 resin so I can actually watch the coating happen without eating a face full of flying resin.
This research project is part of one of my BME classes. I chose it because I wanted to really push what 3D printing is capable of — these parts are so small that this project has basically become my way of finding the actual limits of the Formlabs 3BL.
The project: design and fabricate a microneedle patch (positive and negative) for drug delivery. We needed a patch with controlled drug release that could also hold specific polymers and nanoparticles. Down the line, those nanoparticles would be magnetoelectric, so we could actually steer them to specific sites in the body using magnetic fields.
For reference, the microneedles have a 500 micron base and a 1mm height.
To print that small, I had to build custom settings for the 3BL from scratch. All of this has been done using Clear V4.1 resin, which isn't ideal since it's, well, clear, but it's what we have in the lab.
The custom settings let me print at a 10 micron layer height for precision. I had to dial in exposure (separate values for perimeter, model fill, supports, and top surface, plus a whole exposure schedule for the earliest layers), roller speed, and cure timing to actually get results that held up.
First attempts were a total failure. The needle kept coming out with a bulbous tip instead of the sharp point I'd designed. I figured maybe my post-laser cure wait time was too long, so I dropped it to 0 seconds.No luck.I was driving to school one day and it finally clicked.
I'd designed the needle to taper down to an infinitesimally small point, but the 3BL's laser only has an 85 micron spot size — it's physically incapable of printing anything smaller than that. So the printer kept trying to hit a point that didn't exist for it, and just cured on top of itself over and over, which is exactly what was causing the inverse cone. I was genuinely irritated with myself for not catching that sooner. It's the kind of thing I should've thought of on day one.
So I redesigned the tip to be 85 microns instead of a true point, and that fixed the core issue. There's still a slight bulbous tip, but it's dramatically better, and it was time to move on to the next part of the project.From there, I ran the print at a few different angles — 0°, 15°, 45°, and 90° — to see which gave the most consistent, reliable result. At 0° and 15°, the inverse cone was still noticeable and print quality wasn't consistent. At 90°, the cone disappeared, but resin dripped down the needle and partially cured on the way, leaving these little icicle-like drips instead of a clean tip. 45° turned out to be the sweet spot: the cone was mostly gone and the prints came out consistent batch after batch, so that's the angle I've stuck with since.
Post-processing matters just as much as the print itself. Once a print finishes, I hang the build plate so leftover resin can drip back into the tank, soak the needles in 99.9% IPA for 5 minutes to strip off any excess resin, and finish with a UV and heat cure (60°C for 15 minutes) to bring the mechanical properties up to where they need to be.
Then came testing. First, a basic penetration test — piercing sheets of aluminum foil. The needles pierced clean through without getting damaged. From there, I ran real compression testing on Instron's Universal Testing System, checking both the buckling threshold and full failure. The needles buckled at 20 kgf and didn't fully fail until 120 kgf. For reference, other studies show it only takes about 3.6 kgf to insert a microneedle into skin, so these needles have way more strength than they'll ever actually need.
While I was running mechanical testing, my teammate was tackling the negative mold. We initially hoped to outsource that step, but the two vendors we reached out to both passed since it wasn't headed toward full-scale production. So we brought it in-house with silicone molding, casting directly off the positive prints. Two-part liquid silicone didn't work at first. It couldn't fully cure while touching the resin/ so we switched to a two-part putty silicone, which held its shape and let enough air through to cure properly. Checked under a microscope, the resulting molds matched the original positive extremely well.
From there we started testing actual polymers in the mold, starting with Tannic Acid for its versatility, low cost, and compatibility with easy-to-evaporate solvents like acetone. Using the spin coater, we found it evaporated the solvent fine but also pushed the polymer straight out of the mold — so we pivoted to centrifuging instead, redesigning the molds to fit centrifuge tubes. So far, a 2:1 polymer-to-solvent ratio spun at 3,000 RPM for 3 minutes has given us the most solid, workable patches yet.
Somewhere in the middle of all this, I also ended up designing and building a new spin coater from scratch in Solidworks. The old one had a platform that wasn't perfectly flat, which threw off the balance and made the whole thing shake at speed, wrecking the coating. The new one is fully 3D printed in PETG (way more chemically resistant than PLA, and it won't crack, swell, or degrade from repeated solvent exposure), plug-and-play with just a USB-C cable and a lithium battery on an XT60 connector, and it's got a lid made from clear, post-processed Clear V4.1 resin so I can actually watch the coating happen without eating a face full of flying resin.
