
Our university’s 3D print lab originally used a Google Scripts–based submission system that caused constant problems.
Students could upload incorrect file types, were required to manually name each part, could submit items larger than our build plate, and sometimes entered incorrect email addresses, leaving us no way to contact them. Additionally, multiple parts were treated as a single job, forcing staff to wait until all prints were completed before releasing any of the items.
The new system fixes these issues by validating file types at upload, automatically naming and separating parts into individual jobs, enforcing build-plate size limits, and requiring accurate contact information, allowing staff to process and release prints more efficiently.
I partnered with a computer science major to build the solution. He designed the form logic, while I implemented and integrated everything using Power Automate and Excel.
Behind the scenes, the system runs on multiple Power Automate flows. This section focuses on the 3D-printer flow that transfers form data into Excel.

Sreceiving an HTTP request from the form. The HTTP method is set to POST since the form is sending data. A JSON schema is created from the form and imported into Power Automate. This schema acts as the framework for all of our dynamic content, which is used throughout the rest of the flow.
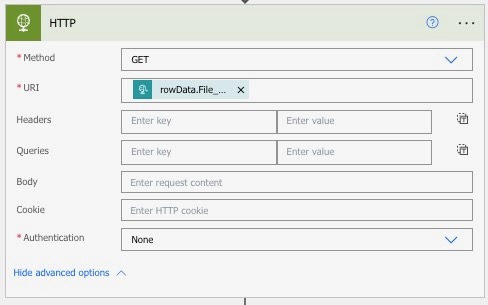
Step 2 is an HTTP GET request to our server. The server processes the submitted file by converting the data from Base64 to binary. This allows us to properly extract all of the data from the .stl file that was submitted.

Step 3 is creating the file. All files are archived and organized by semester so we can easily retrieve them later if someone needs a file from a previous semester, such as a past capstone project. The file content comes directly from the server. Each file is also assigned a unique order ID. This makes files easier to find and allows our logic to work correctly later. When a print is finished and a column is marked as “DONE,” the flow knows exactly which row to look at and can send the correct verification email.

Step 4 uses most of the dynamic content created from the JSON schema to place information into specific Excel files and sheets. Power Automate allows data to be placed into multiple sheets within the same Excel file. This is especially useful for a class called EGR102, where freshman engineering students are required to design within a price framework. Another flow checks which class section the student is in and sends the relevant data not only to the main form, but also to a second form that calculates how much the student is charged for their 3D print or laser-cut part. Professors previously had to do these calculations manually, and this process is now fully automated.
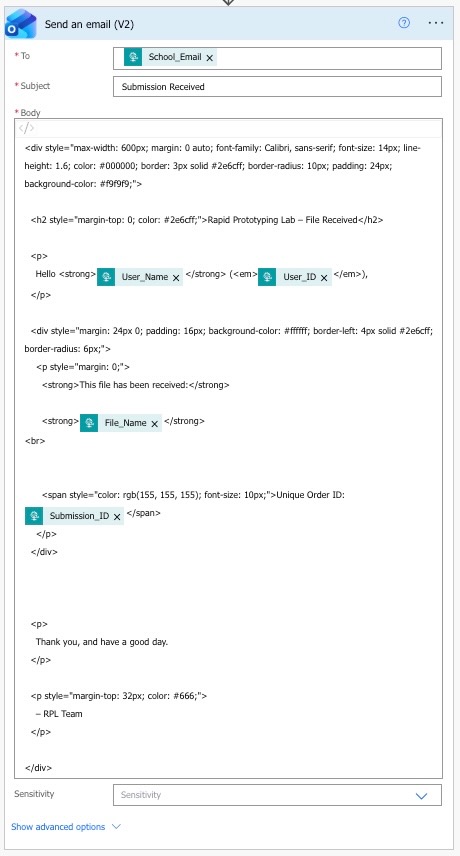
The final step is email verification. This step must be at the very end of the flow because if any part of the flow fails, the email will not send. It is the student’s responsibility to ensure they receive a confirmation email. If they receive the email, their part was successfully submitted. Students also receive another email when their part is completed.

Power Automate also allows for backend troubleshooting. I can see every input and output at each step of the flow. If a student’s submission is corrupted, I can identify exactly where in the flow the issue occurred. I also had to design for long term use. Power Automate allows for 40,000 actions per day. An action is every single logic inside a flow, not just the flow itself. This constraint influenced how flows were designed, particularly those that iterate through large datasets.
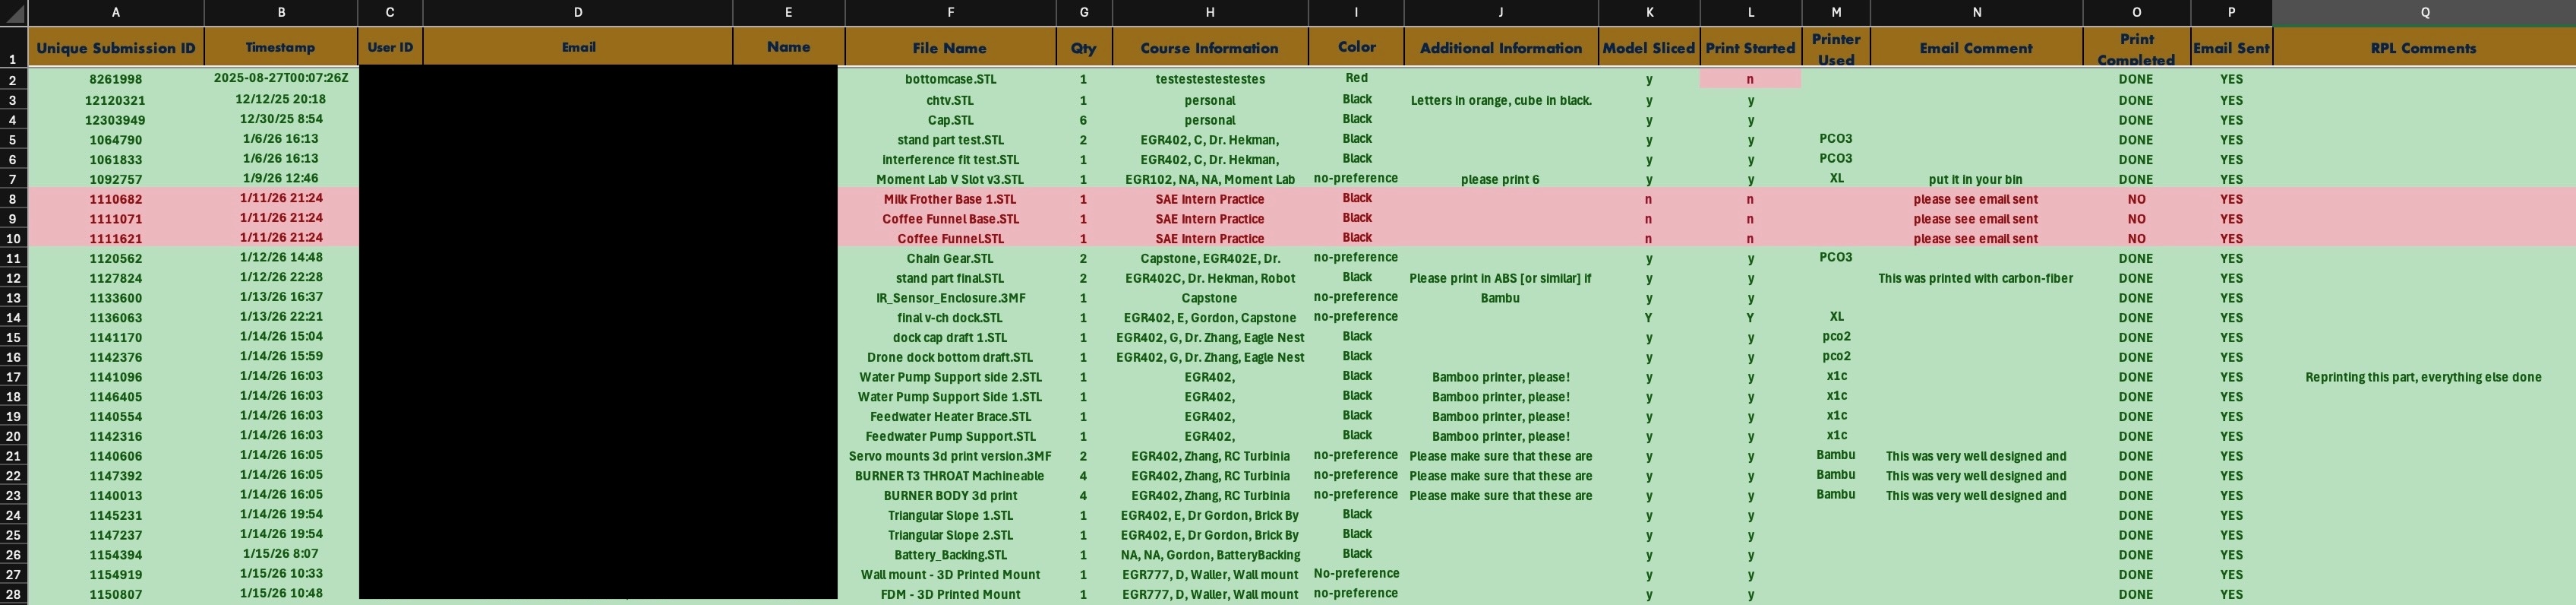
In the Excel sheet, everything is laid out from left to right to create a clear workflow for the student workers. The sheet is designed to guide them through the process: student name, file name, quantity, course information, color, and additional information from the submitter. Models are then marked as sliced, printed, which printer, and then completed.
In the “Print Completed” column, workers mark the part as either “DONE” or “NO” and then run the appropriate flow. This sends the student an email letting them know whether their part has been completed or denied. If the part is denied, the worker can enter an explanation in the “Email Comment” column so the student knows what went wrong and can resubmit their part if needed.
In the “Print Completed” column, workers mark the part as either “DONE” or “NO” and then run the appropriate flow. This sends the student an email letting them know whether their part has been completed or denied. If the part is denied, the worker can enter an explanation in the “Email Comment” column so the student knows what went wrong and can resubmit their part if needed.